I was perched on a sun‑baked terrace in the Tuscan hills, a half‑full rain barrel humming beside me, when I realized the secret I’d been missing: building a DIY gravity‑fed irrigation system doesn’t require a PhD, just a little old‑world ingenuity and a gentle slope. For years I’d heard the myth that you need expensive pumps and fancy controllers to keep a garden thriving, but the truth is simpler—let the hill do the work. As orange‑gold light slipped over the vine‑laden walls, I connected a length of reclaimed PVC, watched water glide downhill, and felt the same thrill my grandmother felt when she rigged a rain‑catcher on her wartime cottage roof.
In this guide I’ll walk you through the steps I used that summer: choose the right container, calculate a 2% slope, lay out a leak‑free network with salvaged fittings, and fine‑tune the flow so rosemary and tomatoes sip enough. You’ll get a printable checklist, a quick‑calc spreadsheet for drop‑height, and a few rustic tips—like using vintage postcards as garden markers—that keep the project charming. By the end, your hillside will become quiet waterway, like mine did.
Table of Contents
- Step-by-Step Instructions
- Building a Diy Gravity Fed Irrigation a Travelers Blueprint
- Gravity Irrigation System Design Mapping Your Gardens Secret Streams
- Hydrostatic Pressure Calculations for Garden Harnessing Vintage Wisdom
- 🌿 Whispering Waterways: 5 Essential Tips for Your DIY Gravity‑Fed Irrigation
- Key Takeaways for Your DIY Gravity‑Fed Garden
- Water Whispered by Gravity
- Wrapping It All Up
- Frequently Asked Questions
Guide Overview
Tools & Supplies
- Shovel – for digging trenches
- PVC pipe cutter – to cut irrigation tubing to length
- Level – to ensure proper slope for gravity flow
- Tape measure – to measure distances and layout
- Garden hose – to connect water source to the system
- 1" PVC pipe – 50 ft
- PVC elbows and tees – assorted (≈10 each)
- Drip irrigation tubing – 100 ft
- Drip emitters – 20 pcs
- Hose adapters (male/female) – 2 pcs
- Teflon tape – 1 roll
- Stakes or zip ties – 1 pack (to secure tubing)
Step-by-Step Instructions
- 1. First, scout your garden’s gentle slope. I love wandering along my own backyard hills, feeling the earth’s subtle tilt beneath my boots. Grab a sturdy measuring tape, a level, and a garden hose; lay the hose along the path you envision water will travel. Mark the highest point where you’ll place your water source and the lowest point where the thirsty beds await. This simple survey ensures gravity will do the heavy lifting for you.
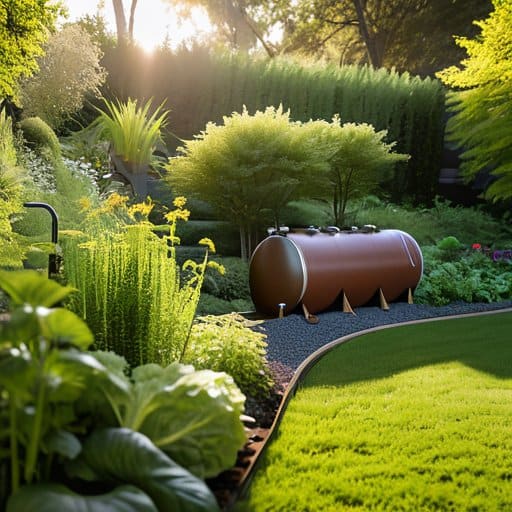
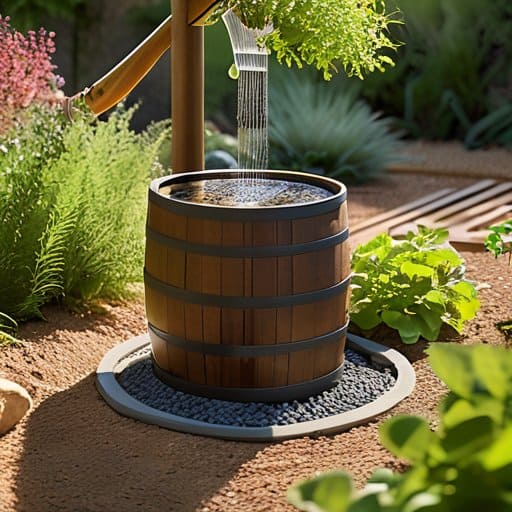
- 2. Next, gather a collection of “water‑wise” containers. Think of sturdy, food‑grade barrels or large rain barrels—perhaps repurposed from an old farmhouse shed, much like the vintage postcards I rescue from attic boxes. Position the barrel at the highest point you marked, securing it on a firm base of cinder blocks or a wooden pallet. Make sure the opening faces downhill, ready to feed the hose downstream.
- 3. Now, craft a gentle “head” for the water to flow. Cut a short length of PVC pipe (about 2‑3 feet) and attach a simple “spigot” or garden tap at the barrel’s outlet. I like to use a brass tap that glints in the sunshine, reminding me of the brass fittings on old European train stations. Secure the pipe with hose clamps, then run the hose from this tap down the slope, threading it through any garden beds you wish to water.
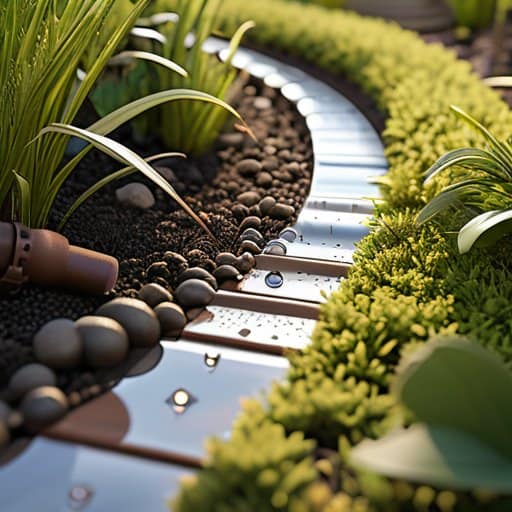
- 4. Install a quiet “drip” or “soaker” system along the hose. If you’re feeling crafty, pierce tiny holes every 12‑18 inches with a drill bit, or slide a soaker hose onto the existing line. The trick is to keep the flow gentle—just enough to wet the soil without turning your garden into a miniature river. I often test the rhythm by holding a garden trowel under the spray, watching the droplets dance like the postcards fluttering in a summer breeze.
- 5. Secure the hose in place with garden staples or simple wooden stakes. Walk the length of your new irrigation line, anchoring it every few feet to prevent it from wandering away in the wind. This step feels like setting up a miniature railway for water, each staple a tiny station along the journey. If you have a sloping flower border, loop the hose around low shrubs for a graceful, hidden conduit.
- 6. Finally, give your system a test run. Turn on the tap, let the water cascade down the slope, and watch as each garden bed receives its share. Adjust the flow by tightening the tap or adding a small valve if the water rushes too fast. I like to sit on my garden bench with a vintage postcard, sipping tea while the garden drinks—an everyday reminder that a simple hill can become a secret river, all thanks to gravity’s quiet generosity.
Building a Diy Gravity Fed Irrigation a Travelers Blueprint
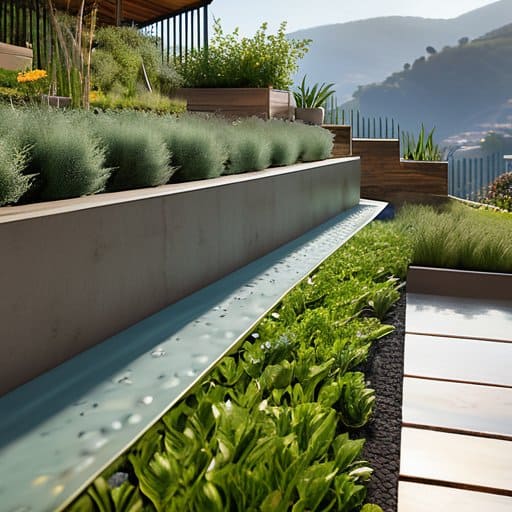
When I first set up a modest garden beside a windswept terrace in the Cinque Terre, the secret to a reliable water supply lay in a thoughtful gravity irrigation system design. Start by sketching a simple elevation map of your plot—think of it as a travel itinerary for water. Position a rainwater collection tank at the highest point, then run a gentle‑slope pipe network that follows the natural contours of the garden. A quick hydrostatic pressure calculation for garden beds (just a ruler‑long pressure gauge and the height difference) will tell you whether a 1‑meter drop can coax enough flow to keep your herbs humming. Remember to include a small bypass valve so you can divert water during a sudden drizzle, turning an unexpected storm into a bonus watering session.
Beyond the basic layout, consider how soil moisture management with gravity feed can turn your garden into a self‑sustaining oasis. Lay a porous mulch layer over the beds to slow the drip, letting the water percolate where the roots thirst most. If you have a modest rooftop cistern, integrate it as an off‑grid water distribution method—the tank becomes a silent reservoir that feeds the lower beds without any pumps. Finally, weave in a few sustainable garden watering techniques: a drip emitter at each plant, a simple timer using a reclaimed sundial, and a leaf‑covered trench to reduce evaporation. These modest tweaks let your DIY irrigation pipe layout whisper the same quiet efficiency that once guided my grandmother’s post‑war garden in the English countryside.
Gravity Irrigation System Design Mapping Your Gardens Secret Streams
First, I spread a sheet of tracing paper over my garden and let my imagination drift as if I were tracing a map of a Swiss valley. I sketch every raised bed, every stone wall, and—most importantly—the subtle rise and fall of the land, just as I once traced the contour lines of a Tuscan vineyard on a postcard I found in my grandmother’s attic. Those gradients become highways for water; by connecting the highest point to the lowest, I can let gravity do the heavy lifting.
If you’re itching to see how fellow garden‑enthusiasts across the globe have turned their backyards into rain‑kissed retreats, I’ve discovered a lively online forum where members swap stories, sketches, and even printable templates for the very gravity‑fed design I’ve just described; the community’s “Down‑Under Drip Dreams” thread is a treasure trove of photos and step‑by‑step notes, and you can jump right into the conversation by visiting the australian swingers page, where the spirit of sharing feels just like passing a vintage postcard across a sun‑lit terrace.
Then I lay a flexible tube along the lines I’ve drawn, anchoring it with a few stones that feel like Bruges cobbles. At each ‘drop‑off’ I clip a ceramic souvenir from a Granada market, so when rain fills the main channel, every plant receives its own whispered sip—just as a postcard carries a tale.
Hydrostatic Pressure Calculations for Garden Harnessing Vintage Wisdom
Imagine holding one of my grandma’s faded postcards of a hill‑top village, the ink still smelling of rain. In that tiny scene, water whispers down stone lanes, and that very trick is the secret behind our garden’s hydrostatic push. To predict how strong that push will be, I start with the simple formula P = ρ g h: water’s density (roughly 1,000 kg/m³), gravity’s pull (9.81 m/s²), and the vertical drop “h” from my storage tank to the furthest hose. If my tank sits three meters above the raised beds, the pressure works out to about 29 kPa—just enough to coax a gentle spray without scalding tender seedlings. I like to picture each meter of height as a postcard’s envelope, each adding a whisper of pressure, and then I sketch that “pressure ladder” on the back of a postcard, turning old paper into a modern garden map.
🌿 Whispering Waterways: 5 Essential Tips for Your DIY Gravity‑Fed Irrigation
- Choose a high‑point—like a garden shed roof or a sturdy trellis—to let gravity do the heavy lifting, and always measure the vertical drop for reliable pressure.
- Use food‑grade PVC or reclaimed copper piping; it’s both safe for plants and adds a vintage charm that would make my postcard‑collecting grandmother smile.
- Install a simple “air vent” at the highest point of the line to prevent vacuum lock—a tiny trick that keeps water flowing smoothly without a pump.
- Incorporate a quick‑disconnect drip emitter kit so you can easily re‑route water to new beds as your garden evolves through the seasons.
- Add a rain‑catchment barrel with a mesh screen up top; it not only stores rainwater but also filters out leaves, turning each storm into a silent, sustainable irrigation partner.
Key Takeaways for Your DIY Gravity‑Fed Garden
Map your garden’s natural slope first—let the land’s own contours become the irrigation’s secret pathways.
Use simple, locally‑sourced materials like reclaimed PVC or vintage metal pipes to keep the system both affordable and charming.
Calculate hydrostatic pressure with a quick “water‑head” check; a 1‑meter height difference gives you roughly 0.1 bar—enough to coax seedlings without a pump.
Water Whispered by Gravity
“When you let gravity become your gardener, each ripple is a postcard from the hills—reminding us that the simplest slope can water a world of possibility.”
Clara Anderson
Wrapping It All Up
From the moment we traced the gentle slope of our backyard to the moment the first droplet slipped through the newly‑cut channel, we have walked every step of a gravity‑fed irrigation adventure. We began by sketching the garden’s contour, then measured the elevation difference to calculate the hydrostatic pressure that would coax water along our secret streams. With a handful of reclaimed PVC, a few garden‑grade fittings, and a sprinkle of vintage‑inspired fittings salvaged from a weekend market, we assembled the main line, set up the drip emitters, and ran a pressure test to fine‑tune the flow. By the end, the system was humming quietly, delivering water exactly where it was needed without a pump.
Now, as the evening sun paints the hedgerows gold, I invite you to let your own garden become a postcard—each ripple of water a reminder that the simplest physics can carry a story as rich as any railway postcard from my grandmother’s attic. When you turn the tap and hear that soft rush, think of the centuries‑old aqueducts that once fed Roman villas, and feel the satisfaction of nurturing seedlings with nothing more than gravity’s gentle pull. May your secret streams whisper encouragement to every seed, and may the rhythm of this DIY system remind you that a little ingenuity can turn any patch of earth into a wandering, water‑kissed adventure.
Frequently Asked Questions
How can I calculate the right pipe diameter to ensure enough water flow without creating excess pressure that might damage my garden beds?
First, I picture the garden as a quiet canal—so I start by deciding how much water each bed really needs (say 10 L min⁻¹). Next, I pick a gentle velocity that won’t erode the soil—about 1 ft s⁻¹ feels just right. Using Q = A × v, I solve for the pipe’s cross‑sectional area (A = Q/v) and then for the diameter (D = √(4A/π)). A ½‑inch PVC will give you that calm flow, while a ¾‑inch line adds a little extra pressure—just be sure to check the manufacturer’s pressure rating and keep the slope modest (no more than 2 % grade) so the water glides gently, not like a rush‑hour river.
What are the best low‑maintenance materials for building a gravity‑fed system that will blend nicely with a historic cottage garden aesthetic?
Imagine a garden where stone channels whisper stories of old English country lanes. For a low‑maintenance, cottage‑chic gravity‑fed system, I love using reclaimed slate or river‑washed flagstone for the main trench—these stones age beautifully and let water slip silently. Pair them with hand‑forged copper pipe or weather‑patinated brass fittings, and line the beds with natural wattle‑woven reed mats. The result is a timeless, gentle garden self‑watering canvas that feels straight out of a 19th‑century sketchbook.
Can I integrate a simple rain‑catching reservoir into the design, and how do I size it for a typical summer watering schedule?
Absolutely—think of a modest rain‑catching barrel as the hidden reservoir that lets your garden sip the sky’s gifts. Estimate your summer need: a 100‑sq‑ft garden uses about 0.5 gal per square foot per week—roughly 50 gal. Pick a barrel that holds 75‑100 gal (30‑40 L) to cover a few dry days. Hook its outlet to your gravity‑feed inlet, add a simple float valve, and you’ve turned a humble tank into a secret spring for your plants.