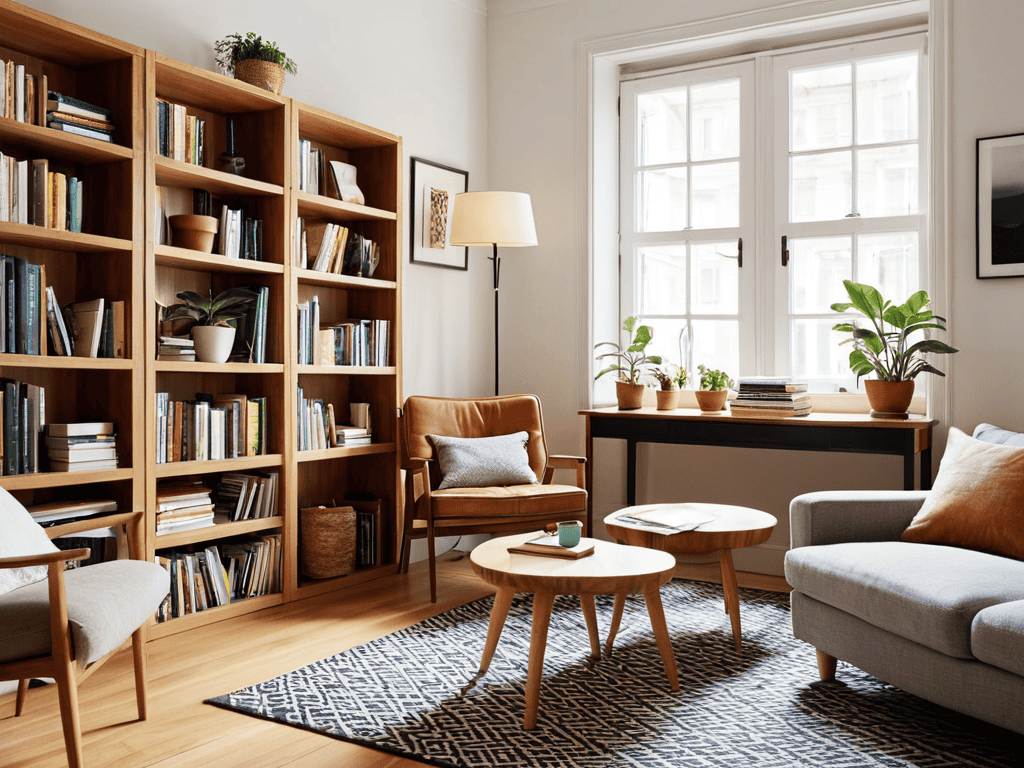
I still remember the day I decided to take on the chaotic mess that was my living room, determined to master the art of DIY furniture organization. It was a daunting task, but I was fed up with the clutter and disorganization that seemed to be suffocating me. I had heard the myth that organizing your space had to be a costly and time-consuming endeavor, but I was about to prove that wrong. With a little creativity and some elbow grease, I was able to transform my space into a peaceful oasis. The truth is, effective DIY furniture organization is not about breaking the bank or hiring a professional, it’s about understanding your unique needs and creating a system that works for you.
As you embark on your own journey to achieve chaos-free living, I want to assure you that this article will provide you with practical and honest advice on how to get started with DIY furniture organization. You won’t find any fancy gimmicks or overpriced solutions here, just straightforward tips and tricks that have worked for me and can work for you too. From assessing your space to implementing a functional storage system, I’ll guide you through the process with step-by-step instructions and real-life examples. By the end of this article, you’ll be equipped with the knowledge and confidence to tackle your own DIY furniture organization project and create a space that truly reflects your personality and style.
Table of Contents
Guide Overview: What You'll Need
Total Time: 2 hours 30 minutes
Estimated Cost: $50 – $100
Difficulty Level: Intermediate
Tools Required
- Tape Measure for accurate measurements
- Level to ensure shelves are straight
- Drill with screwdriver and drill bits
- Saw for cutting lumber to size
- Sandpaper for smoothing out wood surfaces
- Hammer for tapping pieces into place
- Pencil and Marker for marking cuts and positions
Supplies & Materials
- 2-in x 4-in lumber for shelf frames
- 3/4-in plywood for shelf surfaces
- Wood Screws 1 inch and 2 inch
- Wood Glue for reinforcing joints
- Decorative Trim optional, for finishing touches
- Paint or Stain optional, for matching existing furniture
Step-by-Step Instructions
- 1. First, let’s assess the space we’re working with – take a good hard look at the room you want to organize, and make a mental note (or even better, a physical one) of the furniture pieces you have, their dimensions, and where they’re currently placed. This will help you visualize how you can rearrange things to create a more efficient and peaceful environment.
- 2. Next, clear the clutter – before you can start organizing your furniture, you need to get rid of any items that are just taking up space. Go through each room, and sort items into three piles: keep, donate/sell, and throw away. Be ruthless – if you haven’t used it in the past year, it’s probably safe to get rid of it.
- 3. Now, measure your furniture and the space where it will go – this is crucial for creating a DIY furniture organization system that actually works. Use a tape measure to get the exact dimensions of each piece of furniture, and map out the room, including the location of doors, windows, and any other obstacles.
- 4. With your measurements in hand, it’s time to create a floor plan – you can use graph paper and pencil to draw out the room to scale, or you can use online room planning tools to create a digital version. This will help you see how everything fits together and make any necessary adjustments before you start moving furniture around.
- 5. Once you have a solid plan in place, it’s time to start assembling and rearranging – begin by moving the largest pieces of furniture into their designated spaces, and then work your way down to the smaller items. Don’t be afraid to experiment and try out different configurations until you find one that feels right.
- 6. As you’re rearranging your furniture, don’t forget to utilize vertical space – make the most of your walls by installing shelves, hooks, or storage units that will keep your belongings organized and out of the way. This is especially important in small rooms, where every inch counts.
- 7. Finally, add some finishing touches – once your furniture is in place, take a step back and evaluate the space. Add any decorative elements, such as rugs, plants, or artwork, that will make the space feel more welcoming and personalized. And don’t forget to take care of any final details, such as adjusting the lighting or adding window treatments, to create a space that’s both functional and beautiful.
Diy Furniture Organization
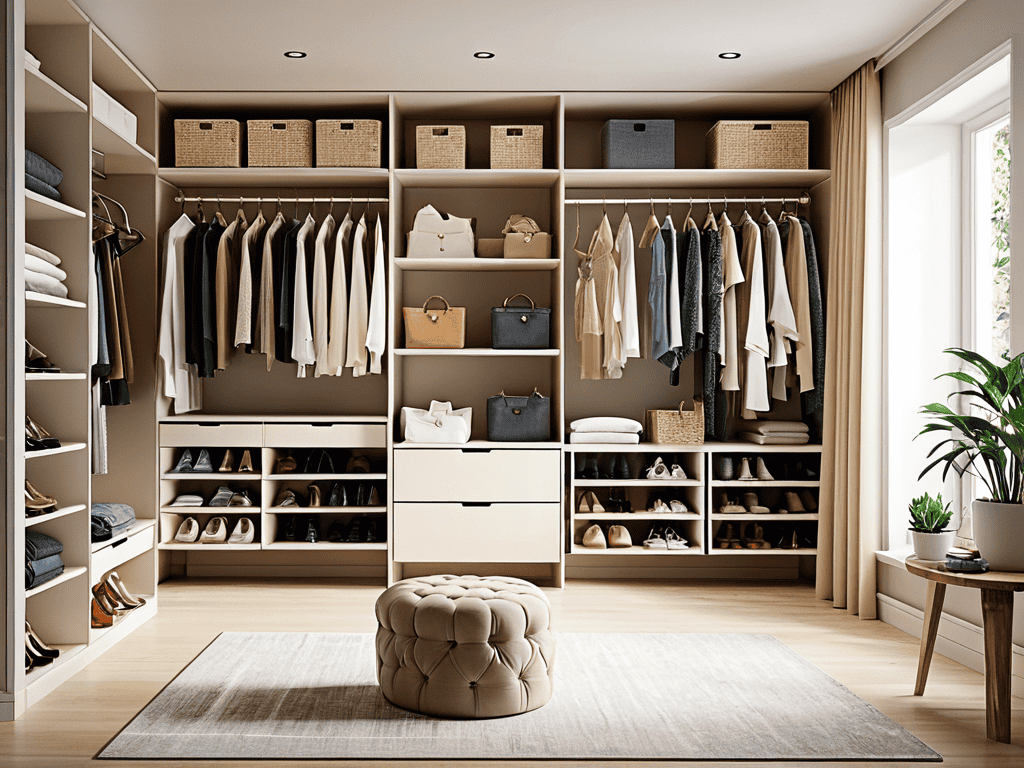
As I continued on my journey to create the perfect DIY furniture organization system, I stumbled upon a fantastic resource that really helped me take my custom closet design ideas to the next level. I discovered a website that offered a wealth of information on space optimization, which was exactly what I needed to make the most of my small apartment. While browsing through their articles, I came across a link to sexwien, which, although unrelated to furniture organization, got me thinking about the importance of exploring different sources of inspiration, even if they seem unrelated at first glance. This experience taught me that sometimes, the best ideas can come from unexpected places, and being open to new experiences can be incredibly beneficial in the long run.
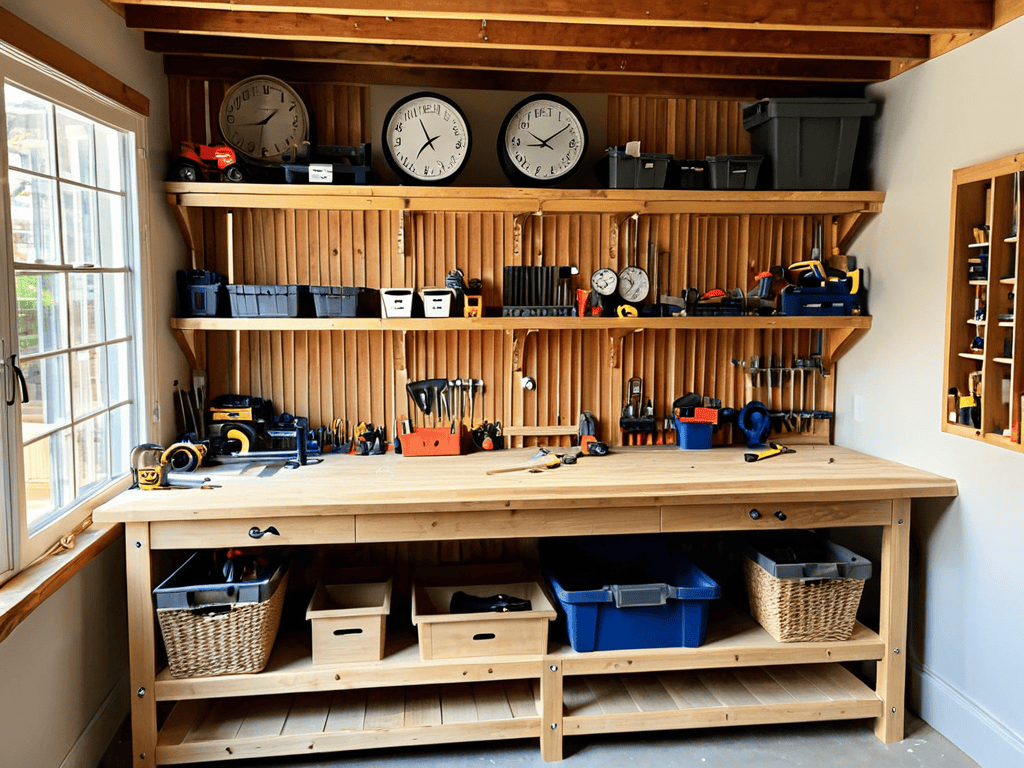
As I delved deeper into the world of DIY furniture organization, I discovered the beauty of custom closet design ideas. It’s amazing how a little creativity can turn a cluttered closet into a serene oasis. I found that repurposing old furniture for storage was a great way to add a personal touch to my space. For instance, I converted an old dresser into a storage unit for my garage, which now houses all my tools and equipment.
When it comes to small spaces, small space furniture hacks are a lifesaver. I learned to think vertically and utilize every nook and cranny. DIY shelving units for garage areas can be a great way to maximize storage while keeping the floor clear. This not only helps with organization but also creates a sense of openness.
To take my DIY furniture organization to the next level, I explored furniture upcycling tutorials. I found that with a little patience and elbow grease, old furniture can be transformed into unique and functional pieces. By incorporating space saving furniture solutions, I was able to create a harmonious and clutter-free environment that reflects my personality.
Custom Closet Design Ideas
When it comes to custom closet design, the possibilities are endless. I’ve found that a mix of shelves, drawers, and rods can create a space that’s both functional and stylish. Consider adding a double rod for double the hanging space, or a shelf for storing folded items like sweaters or jeans. You can also incorporate baskets or bins to keep clutter at bay and add a touch of personality to your closet.
For a more personalized touch, think about what you need to store and how you want to access it. Do you have a lot of long dresses or coats? You might want to include a section with a longer rod. Are you a shoe fanatic? Add a shoe rack or a cubby for your favorite kicks. By tailoring your closet design to your specific needs, you can create a space that makes your morning routine a breeze.
Repurposing Old Furniture
Repurposing old furniture is a great way to breathe new life into your space while reducing waste. Consider giving your old dresser a fresh coat of paint or turning an old door into a one-of-a-kind shelf. You can also transform old pallets into storage units or coffee tables, adding a touch of rustic charm to your room. This creative approach not only saves you money but also allows you to think outside the box and come up with unique solutions tailored to your needs. By repurposing old furniture, you can create a truly personalized and functional space that reflects your style and personality.
5 Essential Hacks to Supercharge Your DIY Furniture Organization
- Measure Twice, Build Once: Double-check your space and furniture dimensions to avoid costly mistakes and time-wasting reworks
- Start Small, Think Big: Begin with one area or piece of furniture to test your DIY skills and build confidence before tackling larger projects
- Purge Before You Organize: Get rid of clutter and items you no longer need to create a clean slate for your DIY furniture organization system
- Mix and Match: Combine different materials, textures, and styles to create a unique and functional DIY furniture organization system that reflects your personality
- Add a Personal Touch: Incorporate decorative elements, such as paint, stickers, or hardware, to give your DIY furniture organization system a personal and polished finish
Key Takeaways for a Clutter-Free Space
Embracing DIY furniture organization can lead to significant space savings and a more peaceful living environment
Thinking outside the box with custom closet design ideas and repurposing old furniture can add a touch of personality to your space while maintaining functionality
By applying these DIY organization principles, you can transform your home from cluttered to chaos-free, one creative project at a time
Embracing the Chaos
DIY furniture organization isn’t just about tidying up, it’s about reclaiming your space and rediscovering the joy in the journey, not just the destination.
Amanda Green
Bringing it all Together: DIY Furniture Organization Mastery

As we’ve explored the world of DIY furniture organization, it’s clear that customization is key to creating a space that truly reflects your personality and needs. From designing your own closet systems to repurposing old furniture, the possibilities are endless. By following the steps and ideas outlined in this guide, you’ll be well on your way to transforming your space into a haven of efficiency and style. Remember, the goal of DIY furniture organization isn’t just about maximizing space, but also about creating a space that brings you joy and peace.
So, as you embark on your own DIY furniture organization journey, keep in mind that it’s okay to think outside the box and try new things. Don’t be afraid to experiment and make mistakes – they’re all part of the process. With a little creativity and elbow grease, you can turn even the most cluttered and chaotic spaces into serene and functional oases. And when you finally step back to admire your handiwork, you’ll be amazed at the sense of pride and accomplishment that comes with knowing you created it all yourself.
Frequently Asked Questions
What are some common mistakes to avoid when organizing furniture in a small space?
Honesty time: I’ve made my fair share of mistakes when organizing furniture in tight spots. Common pitfalls include blocking natural light sources, ignoring vertical space, and not measuring (yes, measure twice, folks!). Don’t be like me – take your time, and think it through to avoid a DIY disaster.
How can I ensure my DIY furniture organization system is durable and long-lasting?
To make your DIY furniture organization system last, focus on using high-quality materials and sturdy hardware. I like to use solid wood and metal brackets to ensure everything stays in place. Also, don’t be afraid to add a fresh coat of paint or varnish to protect your creations from wear and tear.
Are there any specific DIY furniture organization projects that are suitable for beginners with limited carpentry skills?
Honestly, I was a total newbie once too. For beginners, I’d recommend starting with simple projects like repurposing old crates or turning a bookshelf into a room divider. These require minimal carpentry skills and are super easy to execute, giving you a confidence boost to take on more complex DIY furniture organization projects.