I still remember the day I decided to set up my own Modular Pegboard Workshop – it was a total game-changer for my productivity. I had always been skeptical about the idea of a pegboard workshop, thinking it would be a waste of time and money. But, after struggling with cluttered workspaces and wasted hours searching for tools, I finally decided to give it a try. The common myth that a Modular Pegboard Workshop is only for large-scale operations or professional woodworkers is simply not true. In fact, it’s a simple yet effective way to organize your workspace, regardless of its size.
By the end of this article, you’ll know exactly how to create your own Modular Pegboard Workshop from scratch. I’ll share my personal experience, including the most critical mistakes to avoid and the best practices for maximizing your workspace efficiency. You’ll learn how to choose the right materials, design a layout that works for you, and implement a system that will keep your tools and supplies organized and within reach. Whether you’re a DIY enthusiast, a woodworker, or just someone looking to optimize their workspace, this guide will provide you with the honest, no-hype advice you need to get started with your own Modular Pegboard Workshop.
Table of Contents
Project Overview
Total Time: 4 hours 30 minutes
Estimated Cost: $100 – $200
Difficulty Level: Intermediate
Tools Required
- Circular Saw ((for cutting lumber))
- Drill Press ((for precise drilling))
- Hand Saw ((for cutting pegboard hooks))
- Tape Measure ((for measuring workspace))
- Level ((for ensuring level installation))
- Wrench ((for tightening bolts))
- Pencil ((for marking pegboard holes))
- Marker ((for labeling pegboard sections))
Supplies & Materials
- Pegboard ((1/4 inch thick, 2 feet x 4 feet))
- 2-in x 4-in Lumber ((for framing the pegboard))
- Pegboard Hooks ((assorted sizes))
- Screws ((1 inch and 2 inches long))
- Wood Glue ((for securing lumber))
- Sandpaper ((for smoothing out lumber))
- Paint or Stain ((optional, for finishing the lumber))
- Wall Anchors ((for securing the pegboard to the wall))
Step-by-Step Instructions
- 1. First, plan your layout by assessing the space where your modular pegboard workshop will be set up. Consider the tools and equipment you’ll be using most frequently and think about how you can arrange them for maximum efficiency. Take some time to sketch out a rough design, keeping in mind the size of your pegboard and the types of accessories you’ll need, such as hooks, bins, and trays.
- 2. Next, assemble your pegboard by attaching it to a sturdy wall or a freestanding frame. Make sure it’s level and secure to prevent any accidents or damage. If you’re using a wall-mounted pegboard, follow the manufacturer’s instructions for installing the necessary hardware, and don’t hesitate to enlist a friend’s help if you need an extra pair of hands.
- 3. Now it’s time to add your accessories, starting with the essentials like hooks for hanging tools, bins for storing small parts, and trays for keeping your work surface clear. Experiment with different configurations until you find a setup that feels intuitive and convenient. Remember to leave some space between each accessory to avoid clutter and ensure easy access.
- 4. Once you have your basic setup in place, think about how you can optimize your workflow by grouping related tools and tasks together. For example, you might create a dedicated area for woodworking, another for metalworking, and so on. This will help you stay focused and avoid wasting time searching for the right tool or material.
- 5. With your modular pegboard workshop taking shape, it’s time to add some personality to your space. Consider adding some decorative elements, such as a favorite quote or a motivational poster, to make your workshop feel more welcoming and inspiring. You could also add some functional touches, like a clock or a whiteboard, to help you stay organized and on track.
- 6. As you start using your modular pegboard workshop, be sure to keep it organized by regularly cleaning and maintaining your space. Set aside some time each week to tidy up, put away any tools or materials that are out of place, and make any necessary adjustments to your layout. This will help you stay productive and ensure that your workshop remains a well-oiled machine.
- 7. Finally, don’t be afraid to experiment and evolve your modular pegboard workshop over time. As you work on new projects and develop new habits, you may find that your needs change, and your workshop needs to adapt. Don’t hesitate to try out new accessories, rearrange your layout, or even add new pegboards to your setup – it’s all part of the process of creating a workspace that truly works for you.
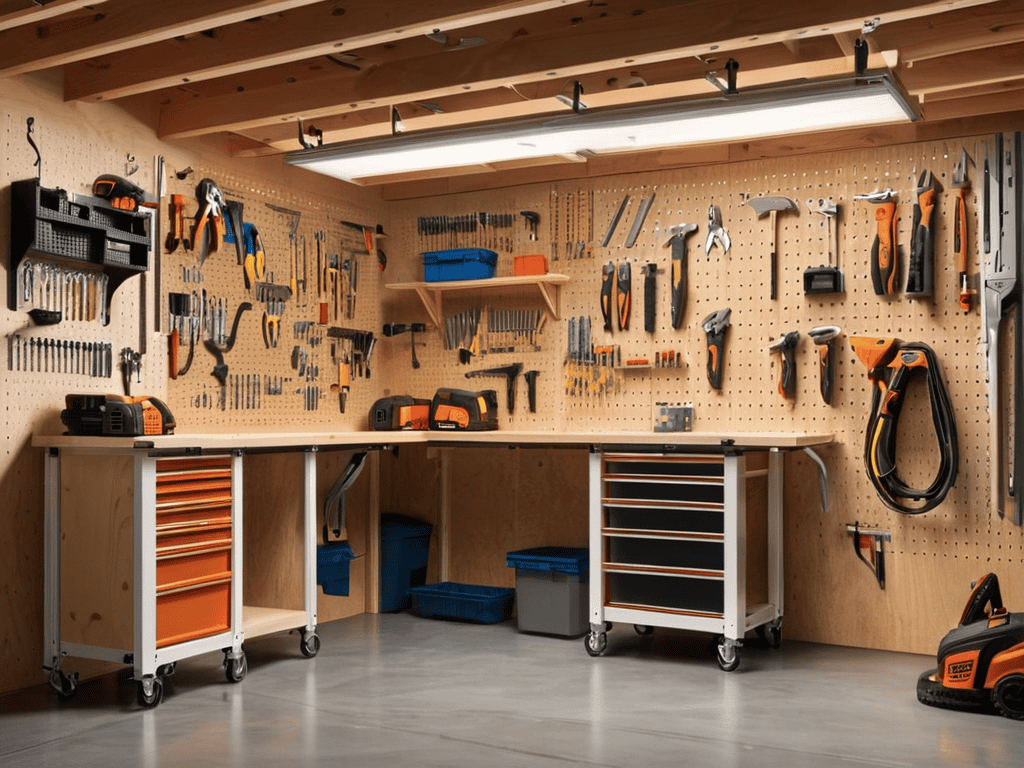
Modular Pegboard Workshop
When it comes to maximizing the potential of your workspace, a well-planned custom pegboard design can make all the difference. By taking the time to assess your specific needs and tool usage, you can create a layout that perfectly complements your work style. This, in turn, can lead to increased productivity and a more enjoyable working experience. Consider the types of tools you use most frequently and position them in easy-to-reach locations.
To further enhance your workspace, consider incorporating modular workshop storage solutions. These can include shelving units, cabinets, and drawers, all of which can help keep your tools and materials organized and within reach. A well-organized workspace not only reduces clutter but also saves time that would be spent searching for misplaced items. By implementing a few simple pegboard tool organization ideas, you can create a workspace that is both functional and efficient.
In addition to pegboard design, workshop layout optimization plays a crucial role in creating a well-oiled machine. Consider the flow of your work and position your tools and equipment accordingly. A diy french cleat system can be a great way to add versatility to your workspace, allowing you to easily move and reconfigure your tools as needed. By combining these elements with modular shelving units, you can create a workspace that is tailored to your unique needs and work style.
Custom Pegboard Design Secrets
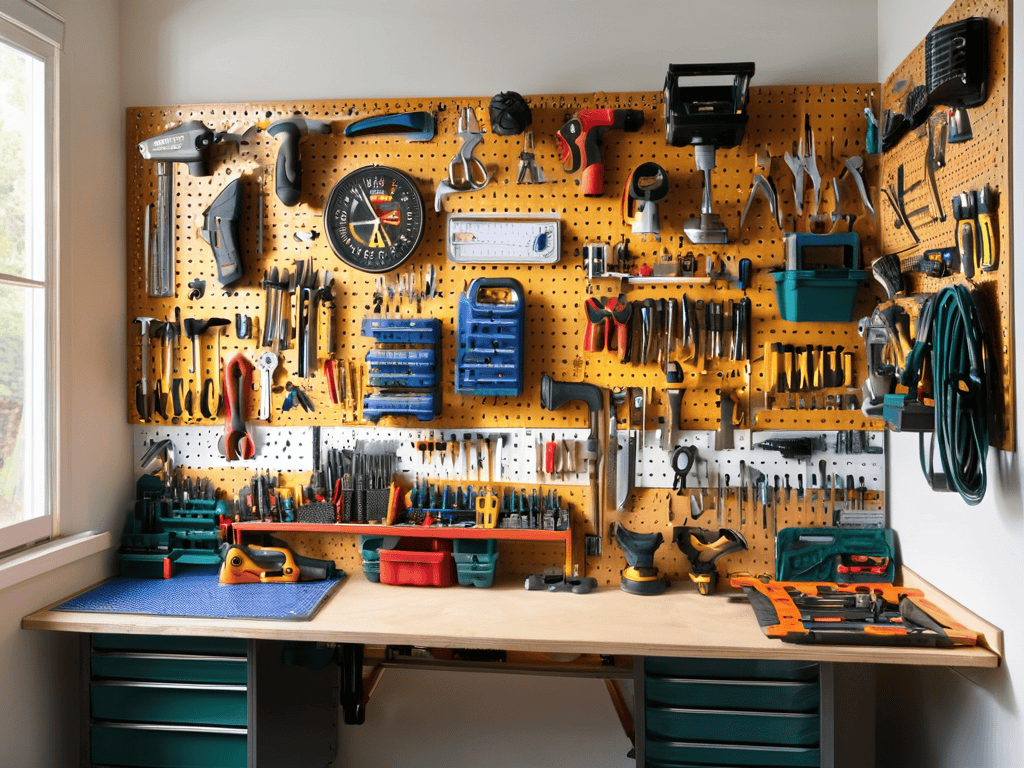
When it comes to creating a truly functional modular pegboard workshop, the key is in the customization. I’ve found that taking the time to design a pegboard layout that’s tailored to my specific needs has made all the difference. By mapping out the tools and equipment I use most frequently, I can ensure that everything has its own designated spot, making it easy to find what I need in a flash. This not only saves time but also reduces clutter and frustration.
As I was setting up my own modular pegboard workshop, I realized that having the right tools and resources can make all the difference in creating a well-organized space. I stumbled upon a fantastic community at t4m sydney that offers a wealth of information on modular storage solutions, which really helped me take my workshop to the next level. Their forum is filled with like-minded individuals who share their own experiences and tips on how to maximize your workshop’s potential, and I found it to be an invaluable resource in my own journey to creating a pegboard paradise.
To take your pegboard to the next level, consider grouping similar tools together and leaving space for future additions. This will make it easy to adapt your setup as your needs change over time.
Modular Workshop Storage Hacks
One of the biggest advantages of a modular pegboard workshop is the ability to maximize storage space. I’ve found that using stackable bins and baskets to store small parts and tools is a lifesaver. By attaching them to the pegboard, I can keep my work surface clear and still have everything I need within easy reach. It’s also a great way to keep similar items organized and prevent clutter from building up.
I’ve also started using hooks to hang larger items like cords, hoses, and tools, keeping them off the floor and out of the way. This not only saves space but also helps to reduce tripping hazards and makes the workshop feel more streamlined.
Pegboard Perfection: 5 Tips to Supercharge Your Modular Workshop
- Start with a solid foundation: Invest in a high-quality pegboard that fits your workshop’s specific needs
- Keep it flexible: Choose modular components that can be easily rearranged or repurposed as your projects evolve
- Label it up: Use clear and concise labels to identify what’s stored on your pegboard, saving you time and reducing frustration
- Think vertical: Maximize your workshop’s vertical space by stacking pegboards or using wall-mounted storage to keep your floor clear
- Make it a habit: Schedule regular tidying sessions to maintain your pegboard’s organization and ensure your workshop remains a productive haven
Key Takeaways for a Successful Modular Pegboard Workshop
I’ve found that investing in a modular pegboard workshop can completely transform your workspace, making it easier to stay organized and focused on your projects
Customizing your pegboard design to fit your specific needs is crucial – don’t be afraid to experiment and try out different layouts until you find one that works for you
By incorporating modular storage hacks into your workshop, you can maximize your space and keep your tools and materials within easy reach, saving you time and energy in the long run
The Power of Modular
A modular pegboard workshop isn’t just about tools and storage, it’s about crafting a space that sparks creativity and fuels productivity – where every peg, every hook, and every item has its perfect place, and your imagination knows no bounds.
Max Wells
Conclusion
As we’ve explored the world of modular pegboard workshops, it’s clear that creating an efficient and organized space is within reach. From custom pegboard design secrets to modular workshop storage hacks, we’ve covered the essential steps to transform your workshop into a well-oiled machine. By implementing these strategies, you’ll be able to maximize your workspace, reduce clutter, and boost productivity. Whether you’re a DIY enthusiast or a professional, a modular pegboard workshop is the key to unlocking your full potential.
So, as you embark on your own modular pegboard workshop journey, remember that the true power lies in customization. Don’t be afraid to experiment, try new things, and make mistakes. With a little creativity and patience, you’ll be able to create a workspace that not only inspires you but also helps you achieve your goals. As you stand back and admire your newly organized workshop, you’ll realize that the journey was worth it – and that’s the greatest reward of all.
Frequently Asked Questions
What are the most essential tools to hang on a modular pegboard for a small workshop?
For my small workshop, I swear by hanging the essentials: hammer, tape measure, level, pliers, screwdrivers, and a utility knife. These babies are always within arm’s reach, saving me time and frustration. I also add a few hooks for my most-used cords and cables – it’s a total game-changer!
How can I customize my pegboard to fit specific power tools or equipment?
I customized my pegboard by using a mix of standard and custom-made hooks to fit my favorite power tools, like my drill press and impact driver. I also added some 3D-printed holders for my smaller gadgets, giving me easy access to everything I need. It’s amazing how a little creativity can turn a pegboard into a tailored workspace!
What are some creative ways to use modular pegboard panels for maximum storage and organization in a limited space?
I’ve found that using modular pegboard panels on the backs of doors, or even as dividers between workstations, can be a total space-saver. You can also hang them from the ceiling to create a unique storage loft, keeping your floor clear and your gear organized. It’s all about thinking outside the box (or panel, in this case)!