I still remember the first time I tried Building a Bookshelf – it was a disaster. I had envisioned a beautiful, sturdy shelf to hold my favorite books, but what I ended up with was a wobbly, uneven mess. It was then that I realized the common myth that building a bookshelf is a daunting task that requires extensive carpentry experience is simply not true. With the right guidance and a bit of patience, anyone can create a beautiful and functional bookshelf.
In this article, I promise to share my honest and practical advice on Building a Bookshelf. I’ll walk you through the entire process, from gathering materials to putting the final touches on your shelf. You’ll learn how to avoid common mistakes, choose the right materials, and create a shelf that fits your unique style and needs. By the end of this guide, you’ll be equipped with the knowledge and confidence to create a beautiful bookshelf that will be the envy of all your friends and family. So, let’s get started on this journey to create the perfect book sanctuary, and make Building a Bookshelf a fun and rewarding experience.
Table of Contents
Project Overview
Total Time: 4 hours 30 minutes
Estimated Cost: $75 – $150
Difficulty Level: Intermediate
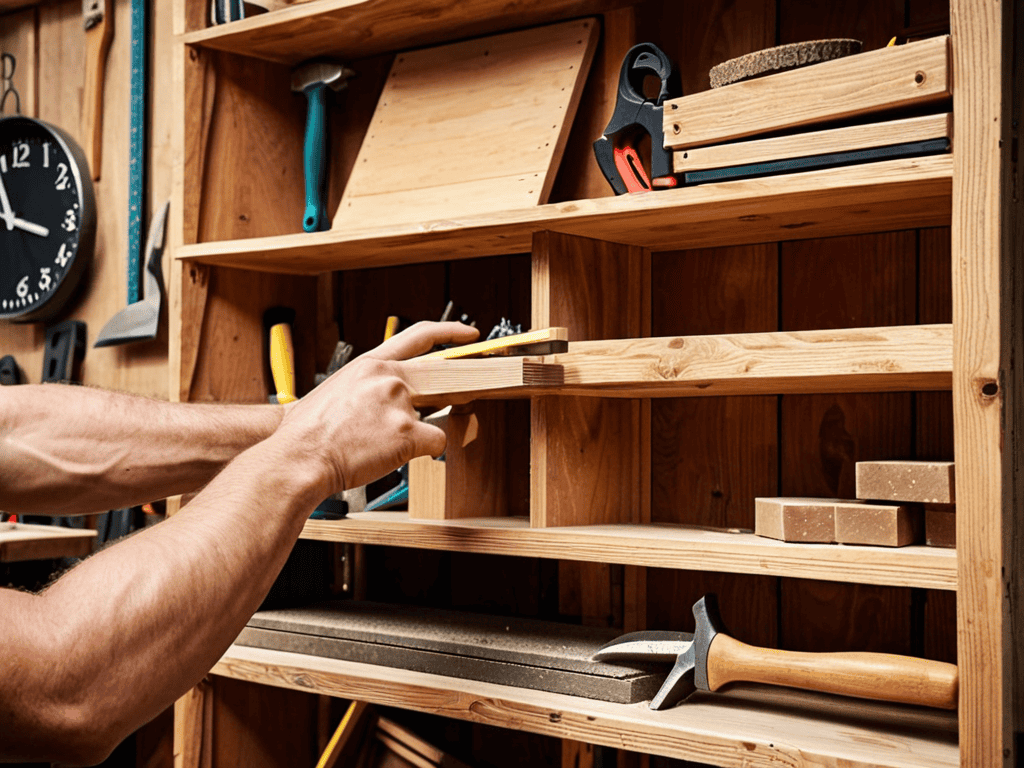
Tools Required
- Circular Saw ((for cutting lumber))
- Drill Press ((for precise drilling))
- Hand Saw ((for fine-tuning cuts))
- Sander ((for smoothing wood surfaces))
- Tape Measure ((for accurate measurements))
- Level ((for ensuring shelf alignment))
- Clamp ((for holding shelves in place))
- Hammer ((for tapping shelves into position))
- Pencil ((for marking wood))
- Square ((for ensuring corners are square))
Supplies & Materials
- 2-in x 4-in lumber ((for shelf frames))
- 3/4-in plywood ((for shelf boards))
- Wood Screws ((for assembling shelves))
- Wood Glue ((for reinforcing joints))
- Sandpaper ((for smoothing out surfaces))
- Paint or Stain ((for finishing the bookshelf))
- Decorative Trim ((for adding a finish touch))
Step-by-Step Instructions
- 1. First, let’s start with the foundation of our bookshelf, which is the base. We need to cut four pieces of wood to the same length for the legs and the shelves’ supports. Make sure they are all even and precisely cut to avoid any wobbling.
- 2. Next, we’ll assemble the shelves themselves. This involves cutting the wooden planks to the desired length and width for each shelf. Remember to sand down the edges to prevent any splinters or rough spots that could damage your books or other items.
- 3. Now, it’s time to attach the shelves to the legs and supports. Use wood screws to secure them firmly, ensuring the shelves are level and evenly spaced. Double-check your measurements to avoid any mistakes that could compromise the stability of the bookshelf.
- 4. With the basic structure in place, we can move on to adding the back panel. Cut a piece of plywood or MDF to fit the back of the bookshelf, and attach it using nails or a nail gun. This will provide additional support and give your bookshelf a more finished look.
- 5. The shelves are taking shape, but we need to add some extra support to prevent them from sagging under the weight of the books. Cut additional wooden pieces to fit between the shelves, and attach them using wood glue and clamps to hold them in place while the glue dries.
- 6. It’s time to add the finishing touches. Sand the entire bookshelf to smooth out any rough spots, and apply your choice of stain or paint. Let it dry completely before applying a second coat or sealant. This step is crucial for protecting the wood and giving your bookshelf a professional finish.
- 7. Finally, attach any decorative trim or molding to the edges of the shelves or the top of the bookshelf. Use a miter saw to make precise angled cuts, and attach the trim using a nail gun or wood glue. This will give your bookshelf a polished, custom-made appearance.
Building a Bookshelf

As you work on your diy bookcase plans, consider the type of wood you want to use. Wood finishing techniques can make a big difference in the final look of your bookshelf. If you’re using MDF, you’ll want to make sure you’re prepared for the extra steps involved in building with mdf. This includes properly sealing the edges and using the right type of paint or stain.
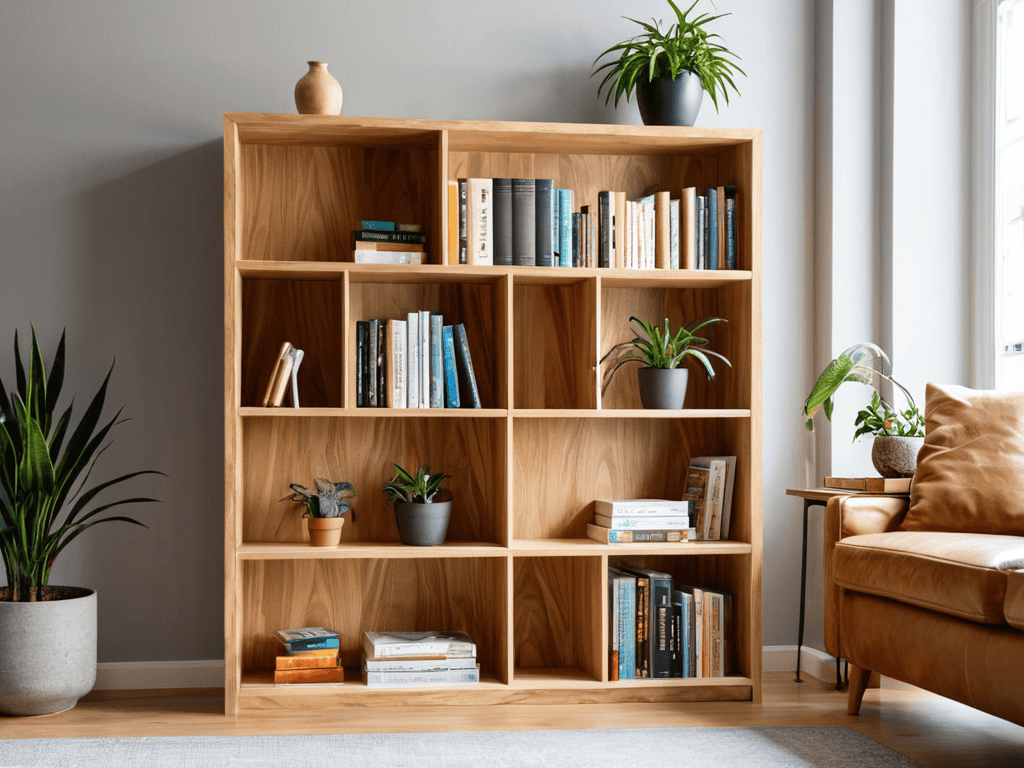
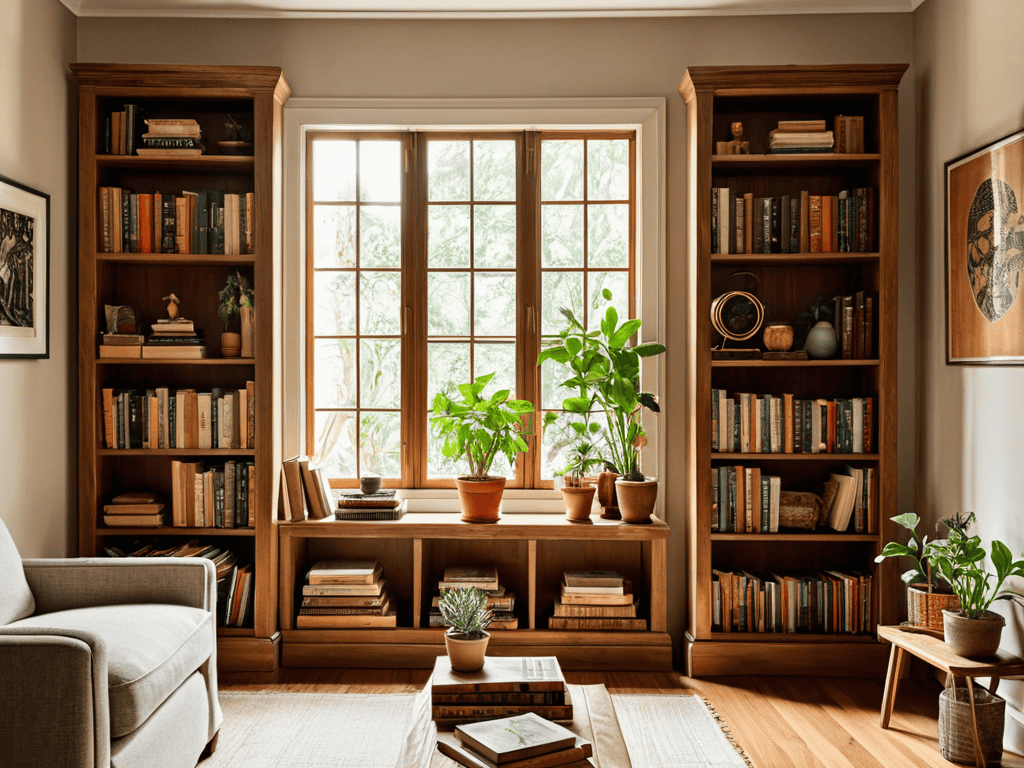
When it comes to bookshelf design ideas, think about the style you’re going for. Do you want a modern, sleek look or a more rustic, traditional feel? This will help you decide on the type of hardware and any additional decorative elements you want to include. Custom shelving solutions can be a great way to add a personal touch to your bookshelf, making it truly one-of-a-kind.
To keep your bookshelf organized, consider implementing some bookshelf organization tips. This can include using dividers or baskets to separate different types of books or decorative items. By taking the time to think about the little details, you can create a beautiful and functional bookshelf that you’ll enjoy for years to come.
Custom Shelving With Wood Finishing
To add a personal touch to your bookshelf, consider custom shelving with wood finishing. This involves selecting the perfect wood stain or paint to match your home’s decor. You can choose from a variety of finishes, such as oak, maple, or cherry, to create a unique look. Applying a wood finish can be a bit tricky, but with the right tools and techniques, you can achieve a professional-looking result.
As you’re putting the final touches on your bookshelf, you might want to consider adding some decorative pieces to really make it stand out – after all, it’s all about creating a unique space that reflects your personality. If you’re looking for some inspiration, I’ve found that checking out local art scenes or even just browsing through some online resources can be a great way to get a feel for what’s out there. For instance, you could explore the vibrant city of Hamburg, where art and culture seem to seep from every brick – and if you’re interested in learning more about the city’s eclectic atmosphere, you can visit sex in hamburg to discover the hidden gems that make it such a fascinating place, from its rich history to its VIBRANT NIGHTLIFE, and who knows, you might just find the perfect piece to adorn your new bookshelf.
By customizing your shelving with wood finishing, you can enhance the overall aesthetic of your bookshelf and make it a statement piece in your room. Whether you prefer a modern, sleek look or a traditional, rustic feel, the right wood finish can help you achieve your desired style.
Diy Bookcase Plans Uncovered
Now that we’ve covered the basics, let’s dive into some DIY bookcase plans that’ll take your bookshelf game to the next level. From modern and sleek to rustic and charming, there are countless designs to choose from. You can opt for a simple, minimalist look or get creative with intricate details and patterns.
Some popular DIY bookcase plans include the classic ladder design, the industrial-chic pipe bookshelf, and the space-saving wall-mounted bookcase. These plans are not only functional but also add a touch of personality to any room. With a little creativity and some basic woodworking skills, you can create a one-of-a-kind book sanctuary that reflects your unique style.
Shelf Mastery: 5 Expert Tips to Elevate Your Bookshelf Game
- Measure Twice, Cut Once: The golden rule of carpentry still applies, ensuring your shelves fit perfectly and your materials don’t go to waste
- Choose the Right Wood: Different types of wood offer unique characteristics, from durability to aesthetic appeal, so pick the one that suits your bookshelf’s purpose and style
- Design with Functionality in Mind: Consider the items you’ll be placing on your shelves, from large textbooks to small ornaments, to determine the optimal shelf size and spacing
- Sandbox Your Creativity: Don’t be afraid to experiment with different designs, such as adding crown molding or using glass shelves, to give your bookcase a personal touch
- Add a Personal Touch with Finishing: The final step can make all the difference, whether you choose to stain, paint, or apply a lacquer finish, to match your bookshelf with the surrounding decor
Key Takeaways for Your Dream Bookshelf
Measure twice, cut once: ensuring accurate measurements is crucial for a sturdy and visually appealing bookshelf
Mix and match materials: experimenting with different types of wood and finishes can add a personal touch to your DIY bookcase
Add your personal flair: custom shelving and wood finishing techniques can elevate your bookshelf from functional to a work of art
The Joy of Creation
Building a bookshelf is not just about storing books, it’s about crafting a sanctuary for the mind and soul, where every plank and every nail tells a story of love, labor, and legacy.
Avid Woodworker
Conclusion
As we wrap up our journey to building a bookshelf, let’s take a moment to reflect on the key points we’ve covered. From gathering our tools and materials to custom shelving with wood finishing, we’ve explored the ins and outs of creating a beautiful and functional book sanctuary. Whether you’re a seasoned DIY enthusiast or a beginner, the process of building a bookshelf can be a fun and rewarding experience that allows you to express your creativity and bring a personal touch to your home.
As you put the final touches on your bookshelf, remember that the true value of this project lies not just in the end result, but in the journey of creation itself. The process of building something with your own hands can be incredibly fulfilling, and the sense of pride and accomplishment you’ll feel when you see your finished bookshelf is truly unbeatable. So don’t be afraid to get creative, try new things, and make your bookshelf a reflection of your unique style and personality.
Frequently Asked Questions
What type of wood is best suited for building a bookshelf?
For a bookshelf, I’d recommend using sturdy woods like oak, maple, or cherry – they’re perfect for withstanding heavy book loads and add a touch of warmth to any room.
How do I ensure my bookshelf is level and securely attached to the wall?
To keep your bookshelf from becoming a wobbly disaster, use a level to ensure it’s perfectly straight, and then secure it to the wall with anchors or screws – trust me, you don’t want it tipping over and ruining your book sanctuary.
What are some creative ways to finish and decorate my bookshelf to match my home's interior design?
Now that your bookshelf is built, let’s talk decoration. Consider adding a fresh coat of paint or stain to match your home’s vibe. You can also get creative with decals, stencils, or even attach decorative trim for a unique touch. Plus, don’t forget about the power of styling with plants, books, and personal treasures to make it truly yours.